Ultimate Guide to Sponge Holder Mount - CarInteriorMix
If you?ve ever tried to keep a detailing sponge, wash mitt, or interior cleaning pad from sliding around your trunk, seatback pocket, or garage shelf, you already know the struggle: wet tools get funky fast, grit gets trapped where you can?t see it, and you end up reusing a sponge that?s doing more harm than good. A sponge holder mount sounds like a small accessory, but it can make your car cleaning routine faster, cleaner, and safer for your paint and interior surfaces.
For car owners who care about interior hygiene and exterior finish, organization is part of detailing. A proper sponge holder mount keeps your wash tools off the floor, allows airflow to dry them, and separates ?paint-only? sponges from ?wheels-only? tools so you don?t cross-contaminate. That?s a big deal when you?re trying to avoid swirl marks on clear coat or greasy streaks on interior plastics.
This guide breaks down the types of sponge holder mounts that work best for car care, how to choose the right one for your setup, and how to install and maintain them so your sponges stay clean and your detailing results stay consistent.
What Is a Sponge Holder Mount (and Why Car Owners Should Care)?
A sponge holder mount is a fixed or semi-fixed device designed to hold a sponge, wash mitt, foam applicator, or scrub pad in a stable position?usually on a wall, inside a cabinet, on a cart, or sometimes even inside a vehicle. The goal is to:
- Keep cleaning tools organized so you?re not hunting for them mid-wash.
- Improve drying and airflow, reducing mildew and odors.
- Prevent contamination by separating tools used on paint vs. wheels, engine bay, or interior.
- Extend tool life by avoiding crushed foam and trapped grit.
Real-world example: If you store your wheel sponge on a shelf and it picks up brake dust residue, then later it touches your paint, you?ve effectively turned it into sandpaper. A dedicated mount with labeled zones helps you avoid that mistake effortlessly.
Where a Sponge Holder Mount Fits in a Car Care Setup
Best locations for your mount
- Garage wall near the wash bucket area: Fast access, good ventilation.
- Inside a detailing cabinet: Clean look, keeps tools out of sunlight and dust.
- On a mobile detailing cart: Perfect if you wash in different spots or do weekend detailing sessions.
- Near a utility sink: Makes rinsing and wringing out sponges easy.
Can you mount one inside the car?
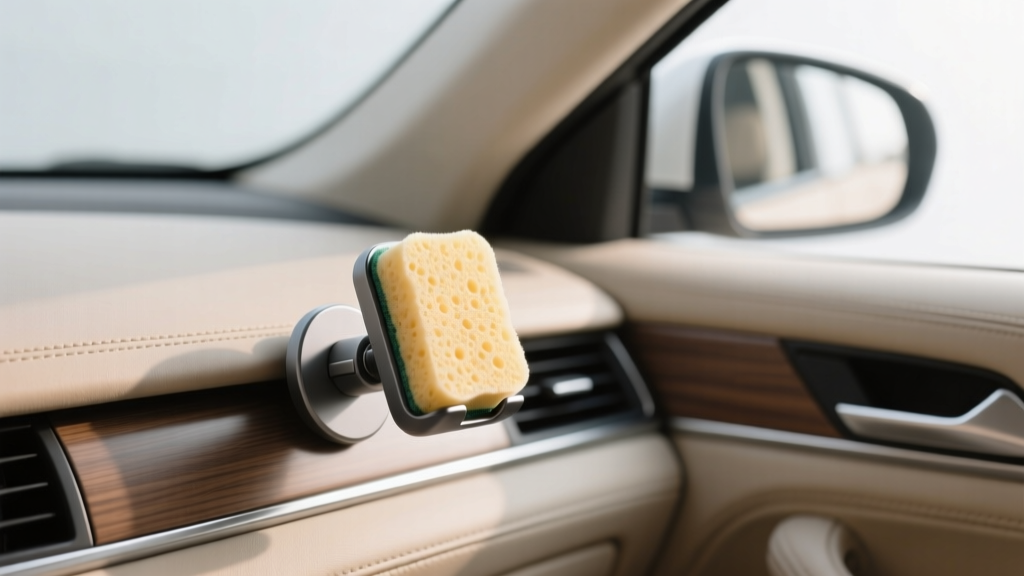
For daily drivers, mounting a sponge holder inside the cabin usually isn?t ideal because moisture and chemicals can create odors and mess. That said, if you keep a dry interior dusting sponge or applicator pad (not wet wash sponges), a small mount in the trunk side panel or a cargo organizer can work well?especially for quick touch-ups.
Types of Sponge Holder Mounts (Pros, Cons, and Best Use Cases)
1) Wall-mounted rack holders
These are the classic solution: a rack or bracket mounted with screws/anchors.
- Pros: Most secure, holds heavier wet items, best airflow.
- Cons: Requires drilling; not ideal for renters.
- Best for: Home garages, dedicated detailing areas.
2) Adhesive-backed mounts (no-drill)
Usually plastic or stainless hooks/racks with strong adhesive pads.
- Pros: Easy install, clean look, good for smooth surfaces.
- Cons: Can fail with humidity/heat if surface prep is poor; limited load capacity.
- Best for: Cabinets, tiled walls, painted drywall (with caution).
3) Suction-cup holders
Often used on tile, glass, or smooth metal surfaces.
- Pros: Removable and repositionable; no residue if used correctly.
- Cons: Less reliable long-term; can drop if cups get dirty or cold.
- Best for: Temporary setups, renters, mobile detailers.
4) Magnetic mounts
Great if you have metal tool cabinets or steel shelving.
- Pros: Strong hold, quick repositioning, no drilling.
- Cons: Limited to magnetic surfaces; can slide if overloaded.
- Best for: Tool chests, metal racks, steel garage cabinets.
5) Cart-mounted or rail-mounted systems
Detailing carts often support accessory rails or clip-on holders.
- Pros: Keeps everything together; ideal workflow for multi-step cleaning.
- Cons: Takes space; may cost more.
- Best for: Enthusiasts who detail frequently, weekend warriors.
How to Choose the Right Sponge Holder Mount
Before you buy, think about your tools and your environment. A sponge holder mount that?s perfect for a bathroom can fail in a garage that swings from freezing winters to hot summers.
Key buying criteria
- Capacity: How many sponges/mitts/pads do you want to store? Plan for growth.
- Airflow design: Look for open wire racks or slotted holders that let water drip and air circulate.
- Material: Stainless steel and powder-coated metal resist rust; cheap steel can corrode fast.
- Mounting method: Screw-in for maximum security; adhesive for convenience; magnetic for flexibility.
- Weight rating: Wet sponges and mitts are heavier than you think?especially microfiber.
- Cleaning ease: A holder that traps gunk defeats the purpose. Smooth surfaces are easier to rinse.
Pro tip: Separate by ?clean zones?
If you want fewer swirl marks and cleaner interiors, assign tools by task:
- Paint: Ultra-soft wash mitts, paint-safe sponges
- Wheels/tires: Dedicated wheel sponge or scrubber
- Interior: Soft applicator pads and interior scrub pads
- Glass: Separate glass applicators (to avoid wax/grease transfer)
Step-by-Step: Installing a Sponge Holder Mount (Done Right)
Option A: Screw-mounted wall rack (most secure)
- Pick the location: Choose a spot near your wash area but away from direct splash zones that keep tools soaking wet.
- Check clearance: Make sure sponges can hang without pressing against the wall (this helps drying).
- Mark holes: Use a level so the rack sits straight?crooked mounts are annoying every time you see them.
- Drill pilot holes: Use the correct bit for your wall type (drywall vs. masonry).
- Add anchors if needed: Drywall anchors help prevent pull-out when you hang heavy wet mitts.
- Screw in the mount: Tighten until snug; don?t over-torque plastic mounts.
- Test load: Hang a wet sponge and gently tug. If it flexes or creaks, reinforce before you trust it.
Option B: Adhesive mount (fast, renter-friendly)
- Clean the surface thoroughly: Use isopropyl alcohol to remove wax, grease, and dust.
- Dry completely: Adhesives hate moisture. Give it a few minutes.
- Apply and press firmly: Follow the product?s recommended pressure and time.
- Wait before loading: Many adhesives need 12?24 hours to cure. Don?t rush this step.
- Start light: Hang a dry sponge first, then gradually test with wet tools.
Option C: Magnetic mount on a steel cabinet
- Wipe the cabinet face: Dust can reduce grip and scratch paint.
- Place the mount low and stable: Avoid edges where it can get knocked off.
- Add a rubber pad if needed: Some magnets slide on glossy surfaces; rubber adds friction.
Product Recommendations and Comparisons (What to Look For)
Rather than chasing a specific brand, focus on the design that matches your routine. Here are solid ?types? of holders and who they?re best for:
Best overall for most home garages: Stainless steel wall rack
- Open wire design for airflow
- Rust-resistant finish
- Multiple slots so you can separate paint vs. wheels
Best for renters: Adhesive-backed plastic/steel combo holder
- Works well on tile, sealed wood, metal cabinets, and smooth painted surfaces
- Look for high-quality adhesive pads and a wide contact patch
Best for detailing carts: Clip-on rail holder or basket
- Quick access during multi-step washes
- Pairs well with bottle holders and towel hooks
Best for wet wash mitts: Deep basket-style holder
- Supports heavier microfiber mitts
- Reduces the chance of the mitt falling off a narrow hook
Practical Tips for Keeping Sponges Cleaner (and Paint Safer)
- Rinse thoroughly before mounting: If you hang a sponge full of grit, it dries into the foam and becomes abrasive next time.
- Wring out excess water: Drier tools reduce mildew and keep drips off your floor.
- Use labels or color coding: A simple ?PAINT? and ?WHEELS? label prevents expensive mistakes.
- Add a drip tray: A small tray under the holder keeps your garage cleaner and reduces slipping hazards.
- Rotate tools: Keep at least two paint-safe sponges/mitts so you?re not forced to reuse one that isn?t fully clean.
Common Mistakes to Avoid
- Mounting too low near dirt splash: If your sponge sits where tires fling grime, you?re re-contaminating it.
- Skipping surface prep for adhesive mounts: Dust and wax make adhesive fail?usually when the sponge is wet and heavy.
- Using the same holder zone for wheels and paint: Brake dust and road grit are paint?s worst enemies.
- Storing sponges sealed in containers while wet: That ?closed, wet, dark? environment breeds odor and mildew quickly.
- Letting sponges dry with chemicals in them: APC and degreasers can stiffen foam or irritate skin later. Rinse until water runs clear.
Maintenance: Cleaning the Holder and the Tools
How often should you clean the mount?
A quick rinse weekly (or after a heavy detailing day) keeps residue from building up. Monthly, do a deeper clean:
- Remove all tools
- Wash the holder with warm water and mild soap
- Scrub corners/slots where grime collects
- Dry it to prevent corrosion (even stainless can spot if water sits)
How to keep sponges from smelling
- Rinse thoroughly after every use
- Use a dedicated sponge cleaner or a mild detergent soak periodically
- Allow full airflow drying?don?t stack sponges on each other
FAQ: Sponge Holder Mounts for Car Cleaning
1) Can I use a kitchen sponge holder for car detailing tools?
Yes, as long as it?s corrosion-resistant and provides airflow. The main issue is capacity and strength?car wash mitts and larger sponges are heavier than kitchen sponges when wet.
2) Do adhesive sponge holder mounts actually work in a hot garage?
They can, but surface prep and curing time matter. Clean with isopropyl alcohol, press firmly, and wait a full day before loading. If your garage gets extremely hot, a screw-mounted rack is more reliable long-term.
3) What?s the best way to separate wheel tools from paint tools?
Use separate mounts or clearly divided zones on the same rack. Color coding is the easiest: black/gray for wheels, bright colors for paint-safe tools.
4) Should I store a wet sponge in my trunk detailing kit?
Try not to. Wet storage leads to odor and bacteria, and moisture can leak into carpet. If you must, seal it temporarily in a waterproof bag and wash/dry it properly as soon as you get home.
5) How many sponges or mitts should I keep?
For a simple routine, two paint-safe mitts/sponges plus one dedicated wheel sponge is a strong start. If you detail often, add separate tools for lower panels and interior scrubbing.
Next Steps: Build a Cleaner, Safer Detailing Routine
A sponge holder mount is one of those small upgrades that pays off every time you wash: cleaner tools, less mess, fewer paint defects, and a setup that feels professional. Pick the mounting style that matches your space, install it carefully, and treat your sponges like precision tools?because for your paint and interior, that?s exactly what they are.
If you?re ready to level up your organization, start by creating two zones (paint and wheels), add a drip tray, and label everything. Then explore more practical car interior and detailing guides on carinteriormix.com to keep your cabin and your finish looking their best.